How to move from Substack to a self-hosted Ghost blog

Earlier this year, I decided I wanted to start sending a weekly newsletter that featured links to all of my work as a freelance technology journalist. I, of course, opted for Substack because it's what pretty much everyone I know uses and it's free.
Since then, Substack has been in the news not only for allowing Nazis on its platform but defending the decision. Substack's leadership can set whatever standards it wants, and so can I.
I originally wanted to use Ghost for my newsletter, but looking at the monthly cost of Ghost(Pro), I didn't want to end up with a large monthly bill, especially since I don't ever plan on charging for my newsletter.
Then I discovered you can self-host a Ghost blog on Digital Ocean for $6 a month. With unlimited subscribers. Huzzah!
If you're like you and you want to leave Substack, too, but don't want to pay for Ghost(Pro), then here's a rough guide for how I, as someone who doesn't deal with a lot of server-like stuff, moved my free Substack newsletter over to a self-hosted Ghost install using a Digital Ocean Droplet.
How to move from Substack to Ghost
The first thing you'll need to do is sign up for a Digital Ocean account. You can use this referral link to sign up; it gives you a $200 credit that is good for 60 days. Disclaimer: If you end up sticking around and spending $25, I get $25. I think. Either way, it lets you get started with Ghost at zero cost to you.
With your Digital Ocean account created, open this guide with a second tab in your browser. It's the official Ghost guide for creating a Droplet on Digital Ocean. There's a lot of good information in the Ghost's official guide, but later on, in my process of getting everything set up, I found this guide and it's fantastic.
I suggest reading through the official guide to get an idea of what you'll be doing, but then follow the guide on Catalin's Tech up until the point where you create your Ghost admin account.
Now, take a deep breath, and congratulate yourself on a job well done. Then open this YouTube video and follow along, step-by-step, as you're walked through properly setting up the email portion of your Ghost install. There are two different email settings you need to fill out, otherwise, you'll find that users can't subscribe to your newsletter, or you can't send a newsletter. Both of which are problematic.
How to import your Substack content and subscribers to Ghost
If you want to carry over all of your Substack content and subscribers, Ghost has a tool that makes the process really seamless - but it's hidden. Keep in mind, I used the tool, but I don't have a premium tier. All of my subscribers are free.
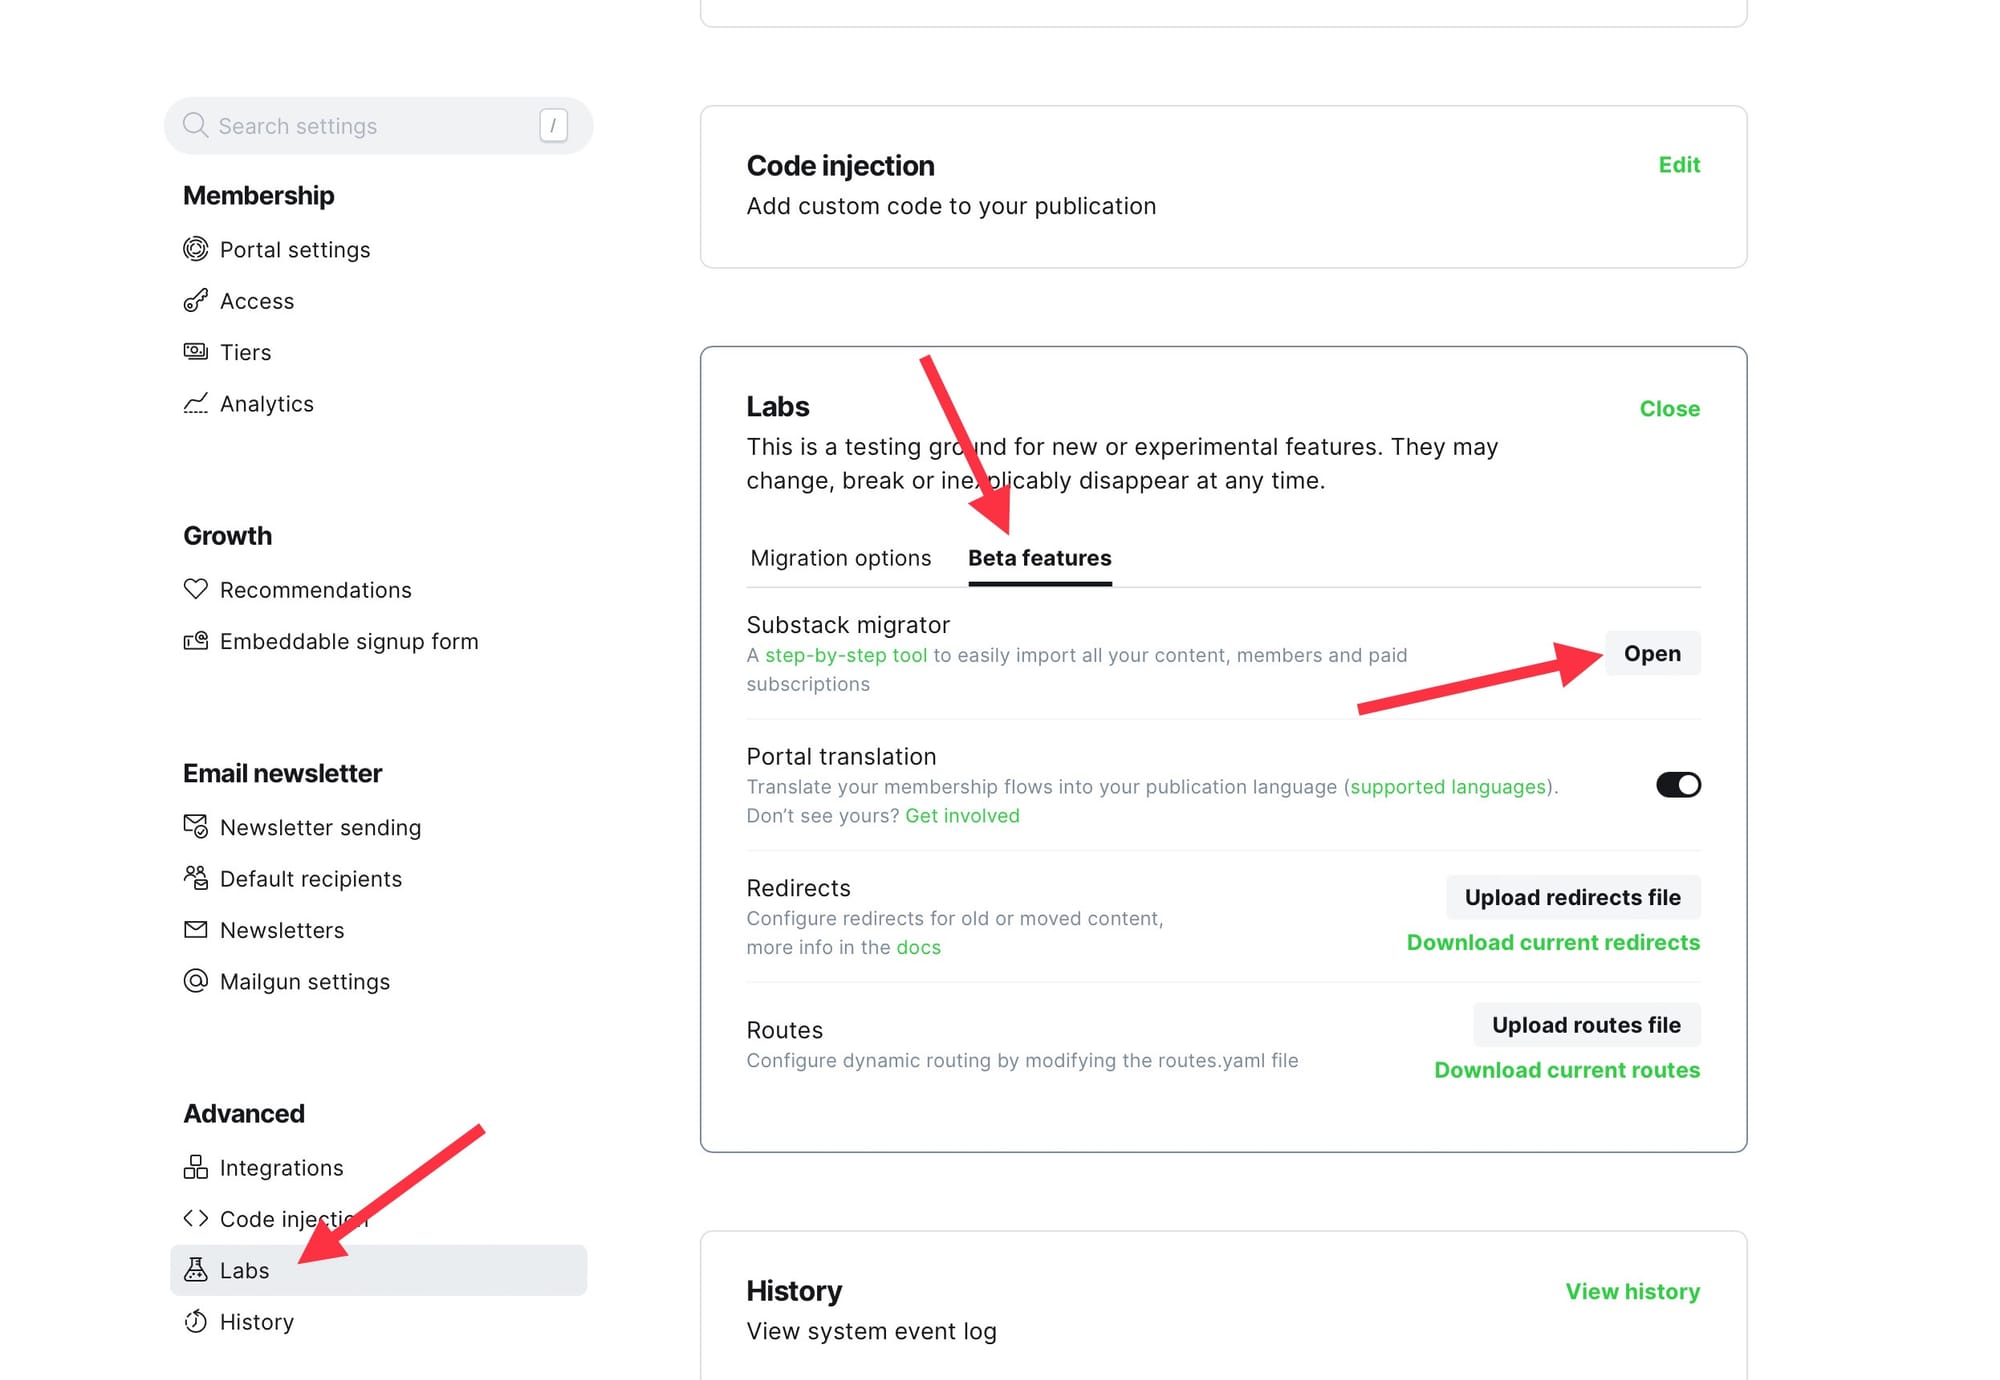
To get started, visit the Settings section of your Ghost admin page (it's the tool icon at the bottom of the admin panel). Next, scroll all the way to the bottom and click Labs. Select Open from the Labs card > Beta Features > Open next to Substack migrator.
From there, follow the prompts to download your Substack information and import it into Ghost.
(If you want a copy of your Substack info of your own, request an export of all your data from Substack. Instructions here. Download the archive from Substack once you receive the email that it's ready.)
Changing the URL to your Ghost install
Once you have Ghost setup, email services working, a theme picked and your Ghost blog looking exactly how you want, you can either go back to the original guide you followed (Step 6, specifically), or follow this short guide to update the URL of your Ghost install.
Once everything is provisioned, you can visit your own URL and view your very own blog that you're in total and complete control over.
Feels good, right?